Thanks to Mario Limonciello (superm1), who works for Dell, I was able to get a process that more or less works, and gives me a recovery option for Kubuntu 9.10.
Here's basically what you need to do.
1) Download the DVD iso for Kubuntu Karmic 9.10 to your system.
2) Visit https://launchpad.net/dell-recovery/+download and grab the latest dell-recovery deb (at least version 0.27) for Karmic and install it from any Karmic system (gdebi can be used here). This will not work from a live CD/DVD as the process requires a lot of temportary space to work with, so you must be in a working Karmic install (Ubuntu, Kubuntu, etc).
3) Now, run the dell-recovery-media program as follows:
dell-recovery-media --builder
The --builder option is a recent addition by Mario, which allows building Dell recovery media from any Ubuntu ISO, so it will work with Kubuntu, with a few tweaks.
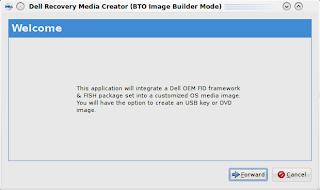
4) Click the Forward button and you are given an opportunity to choose the ISO to build the Dell image from.
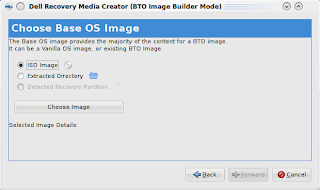
Click on Choose Image and select the Kubuntu DVD iso you downloaded earlier.
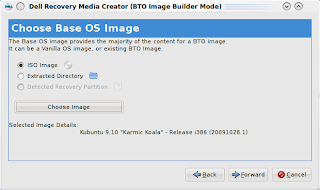
The screen will update and show some details about the image (which should show Kubuntu Karmic 9.10).
5) Click the Forward button, and hit Fetch/Update GIT Tree.
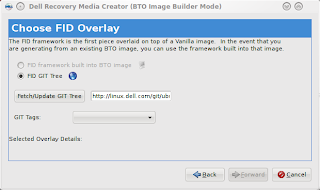
This may take a few minutes to complete.
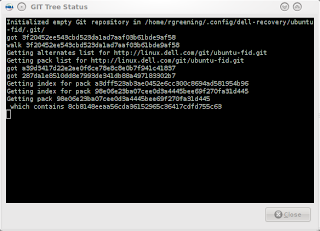
Once the fetch is completed, hit the Close button in the GIT Tree Status window. From the GIT Tags drop down, select Origin/Master.
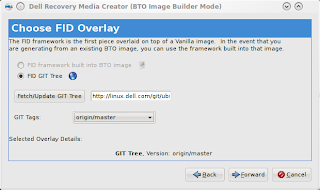
6) Click the Forward button to go to the FISH screen. This allows you to add additional packages to the install process. We are going to skip this for now (I may expand on this in a future post).
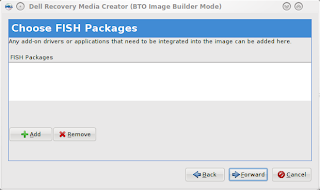
7) Click the Forward button and choose to create a USB Flash Drive
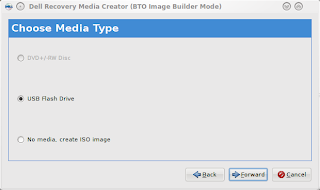
8) Click the Forward button and enter a version number (I chose K00 for Kubuntu ), then click Apply.
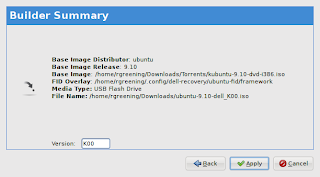
Enter your password when prompted to Authenticate. The program will now start building the new ISO to copy to the USB Stick.

9) This will then launch the usb-creator application. At this point, you should be able to simply click Make Startup Disk (See some of my previous blog entries about usb-creator-kde for more info about this).
10) After the startup disk completes installing, you can close it and the Dell Recovery window which pops up after.
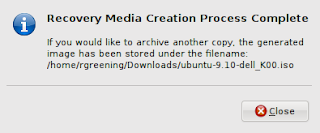
11) The last step you need to perform is to remove the del-recovery deb from the newly created USB Startup Disk, as it is gtk based, and has some additional deps that are not found on the default install media and will thus fail during the install process. Assuming the mount point for the media stick is /media/disk, you would preform the following command to remove this file:
rm /media/disk/debs/main/dell-recovery_*_all.deb
12) It is now safe to unmount the USB Stick or reboot if you wish to install from it now.
13) After you install the new dell image, you should re-install the dell-revocery application. Unfortunately, one of the deps is currently missing from the package. To get around this, you will need to install policykit-1-gnome as follows:
sudo apt-get install policykit-1-gnome
Then use gdebi to install dell-recovery, which you downloaded (refer to step 2 for the link).
14) Now, you can use dell-recovery-media to rebuild the ISO from the recovery partition and make as many USB disks or ISO's as you want. As well, you can now access the restore option in grub (hold space bar during boot to expose the boot options).
I hope this is useful to you. I will be working with Mario to see how hard it would be to create a Qt/KDE front-end for the dell-recovery package, so that we can avoid having to remove anything.
So how do you set up the recovery partition on the Dell hard disk, linked to F12 or whatever? How much space does the partition need and should it be ext3/4?
ReplyDeleteUsing the process I have outlined above, it is all automatic.
ReplyDeleteIt wipes the entire drive, as it would in a brand new factory install (which is what this mimics). No need to set up the partitions ahead of time.
If you do not wish to re-format the entire drive, then this process is not for you.
Ah I see, at step 9 it's installing to the hard disk. That was not at all clear from the text!
ReplyDeleteactually, its making the startup disk on the usb stick at that point and not installing on your HD.
ReplyDeletestep 12 states that you can boot from the newly created usb stick to install the dell image you just created. I dont actually cover that.
your article is very good,you seems so educated
ReplyDelete